
One of the more interesting and unique surgeries we perform is the removal of a bladder stone (called a cystotomy) from California Desert Tortoises (CDT’s), along with various other tortoise species like African spurred tortoises (Sulcatas) and leopard tortoises. This page shows how we treat Tortoise Bladder Stones (Uroliths)
It is usually a problem in captive tortoises, but it has been diagnosed in wild tortoises on occasion. The stones tend to be smaller in wild tortoises.
Some of these stones grow to tremendous size, and it is a wonder that these animals can survive with such a problem. Other animal species get bladder stones, but none of them are anywhere near as large as tortoise bladder stones.
We have been doing surgery to remove bladder stones in tortoises since 1989. This page will give you a detailed description of this surgery, with high quality videos and photos, so you can see how we diagnose and treat this problem. It is one of the more interesting surgeries we perform.
Don’t miss the video of the beating heart at the end of this page.
You can learn more about our standard of care of sick reptiles from the Association of Reptile and Amphibian Veterinarians.
Physiology
The normal waste product for protein metabolism is ammonia. Tortoises convert this ammonia to uric acid, which is less toxic to the bladder wall, and lets them hold water in their bladder for long periods of time.
Tortoises are a desert species, so water conservation is a large part of their physiology as they have adpapted to their arid environment. They can recycle water from their bladder into their system when they do not have access to drinking water.
If the uric acid builds up in high enough levels, a situation that might happen if the tortoise is not drinking and staying well hydrated, the uric acids combines with electrolytes like sodium, calcium, and potassium, to form urates. In a well hydrated tortoise these urates are secreted normally when urinating. In a dehydrated tortoise that is recycling its urine, the urates are not secreted, and can slowly build up into a bladder stone.
When we analyze tortoise bladder stones chemically they are comprised almost exclusively of urates.
Cause
The exact cause is unknown. Dehydration plays a significant factor in this disease. Many people believe that tortoises get all the water they need from their food. This is not true, they need to drink water also, so make sure fresh water is available all day. Periodic soaking is recommended. Use lukewarm water, make sure the water level is no higher than the beginning of the top shell (carapace), and soak for up to 10 minutes. Dry your tortoise off before placing back in its normal environment. Do not soak if your tortoise has surgery unless recommended by your veterinarian.
Diet is also a factor in this disease. For all tortoises, the overwhelming majority of their diet is from plants. If the diet is too high in protein, which would be from feeding dog or cat food, there might be excess urate production, leading to an increased chance of a bladder stone being formed. Your tortoise’s diet should consist of a high percentage of grass, and a lesser amount of green, leafy vegetables.
Symptoms
There are no specific symptoms that tell us a tortoise has a bladder stone, and some of them don’t show any symptoms at all. The more common symptoms are nasal discharge, poor appetite, straining to have a bowel movement, inability to lay eggs, lameness in the back legs, and lethargy.
A tortoise can become paralyzed in the back legs due to mechanical pressure from the bladder stone. The problem can even progress further, and some tortoises can succumb to the bladder stone.
Some of these stones are diagnosed as incidental findings when we take an x-ray or perform an exam for an unrelated problem. The tremendous size of some of the stones indicates they may have been present for years before being diagnosed. Anybody that has ever had a kidney stone can sympathize with what these animals feel like with such large stones.
Diagnosis
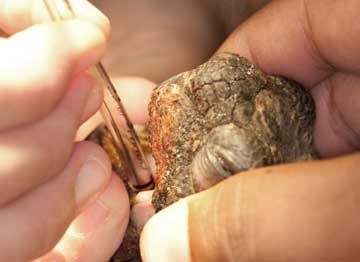
Every tortoise that has a problem gets a thorough head to tail exam. We start with the mouth and work our way back. They are ectothermic, so we do not take their temperatures.
They also do not have external lymph nodes like mammals do, and it is pretty hard to palpate their abdomens or listen to their hearts with a stethoscope due to the shell.
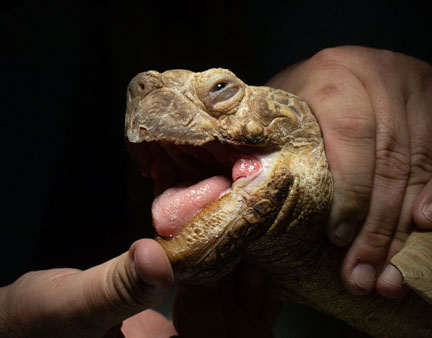
A large part of our exam centers on the head
There are two methods utilized to diagnose bladder stones. During an examination we can sometimes palpate a stone by gently rolling the tortoise back and forth while we feel in the soft spot by its rear leg.
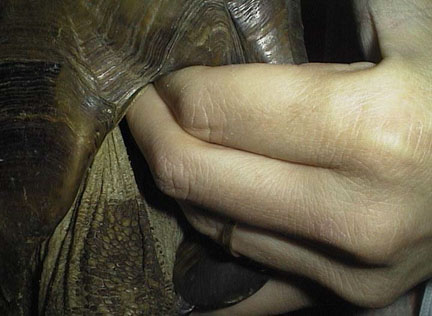
To perform the palpation technique you need to understand tortoise anatomy and be experienced at palpation
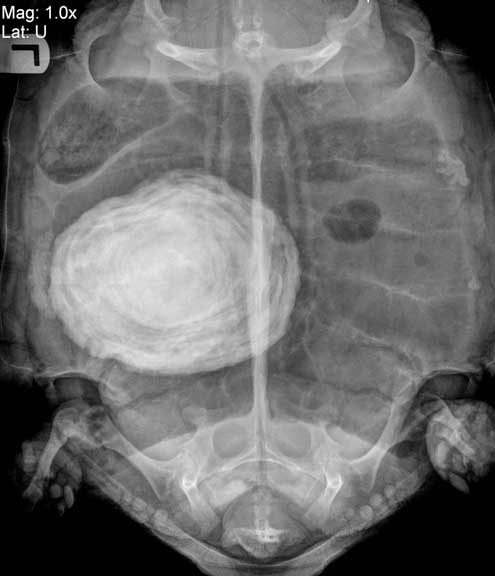
Only a few stones can be found on palpation. The other method to make a diagnosis, and usually more reliable method, is to take an x-ray. By the time we take a radiograph, many bladder stones are large. Some of the stones are so large that we have to break them into pieces to get them out of the opening in the shell the we do the surgery to remove them.

You can see the actual size of this stone measure in cm. It takes 2.5 cm to make up an inch.
Surgery
On rare occasions some tortoise bladder stones are small enough to be removal via the pre femoral approach. It is performed in the same area as the palpation picture above. You can see this in the video below. Click here to see that procedure after you finish this page.
The usual treatment for a bladder stone in tortoises is to perform surgery to completely remove the stone through a hole in the bottom of the shell (the plastron). Most tortoises do fine postoperatively, and after a few days in the hospital, and a few weeks of recuperation at home, they are back to normal.
We tend not to perform this surgery when hibernation is near. During hibernation their whole metabolism is slowed down, and we do not want the healing process impeded in any way. We will wait until May or June for the surgery if we diagnose this problem in the fall before they go into hibernation.
Prior to surgery our patient is prepared to minimize anesthetic risk. This might involve taking a blood panel to check for anemia and to check the protein level. In some patients we place a feeding tube to insure adequate hydration and nutrition, both before and after the surgery. In other patients we insert an intravenous catheter (IV) to maintain blood pressure during surgery.
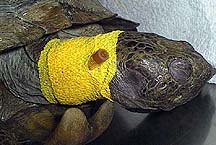
This tortoise has an IV catheter in its jugular vein. We use this vein because it is relatively easy to insert the catheter, and it is large enough to take the volume of fluid we need to give.
Anesthesia
The Long Beach Animal Hospital is one of the few places that attempts to anesthetize reptiles for surgery. We have extensive experience at this and can anesthetize any reptile. This can become especially important if we have an emergency.
We start with pre-anesthetic preparation long before the surgery. This preparation begins with an exam. After the exam we run a blood panel to check for any internal problems or infections in regards to anesthesia.
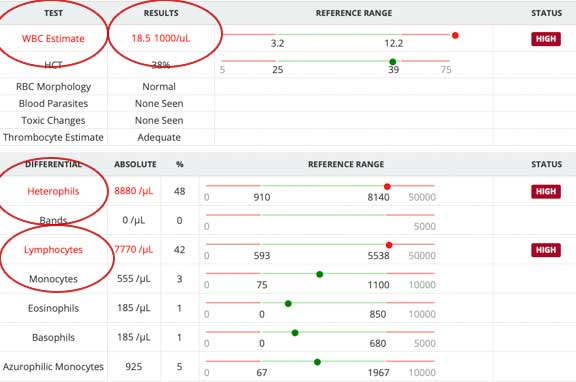
The blood panel on this animal shows an elevated wbc count of 18,500. The normal range is up to 12,200.
Anesthesia is initially induced with a face mask. Sometimes they are given a tranquilizer before we given them anesthetic via the face mask. The anesthetic works rapidly, as long as they don’t hold their breath!
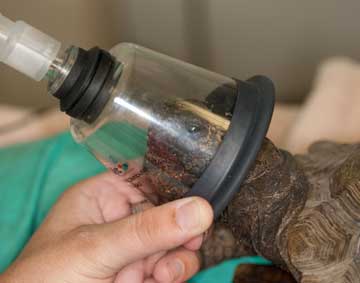
Once the tortoise is stable and ready for surgery, we gently induce anesthesia with a mask that has 100% oxygen and the anesthetic agent. We commonly give a sedative by injection prior to this for further relaxation.
When fully relaxed we gently inserted a breathing tub called an endotracheal tube (ET). This facilitates the administration of oxygen and anesthesia in a much more efficient manner.

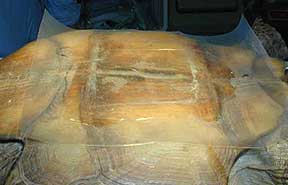
After the tortoise is anesthetized it is placed upside down on a warm water blanket. The bottom of the shell (called the plastron) is cleansed thoroughly. This may take several scrubbings with the use of a gentle brush to get clean enough for surgery.
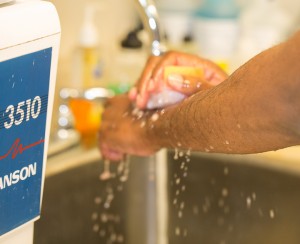
While our tortoise is in surgery being scrubbed our surgeon does he own scrubbing
Now that our surgeon and tortoise are both “clean”, the draping process can begin. This is important to prevent contamination and infection. Infection is especially critical in this surgery because once the cut piece of shell is resealed to the bottom of the shell, an infection can fester on the inside without our knowing about it.

Our patient is prepped and ready to get this huge stone out of its bladder
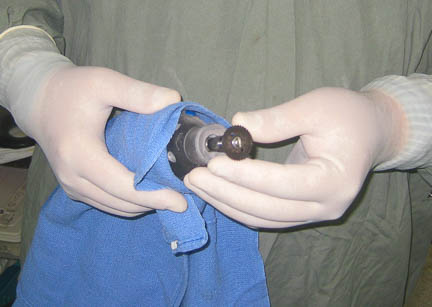
The Dremel is now set up. It will be used to cut the shell.
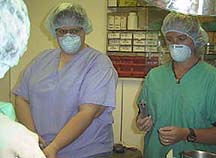
While all of this is going on the rest of the surgical team is preparing for their roles. These assistants are students in our externship program. They will be assisting the surgeon with flushing and suctioning of fluids, along with the administration of anesthesia.
Our student externs are thrilled to be able to assist in this surgeries like this
Even though it is living tissue, which means it has feeling and bleeds, tortoise shells are tough. We use a special drill called a Dremel to cut the shell. We have gone through many of them over the years, and should have purchased stock in Home Depot long ago!
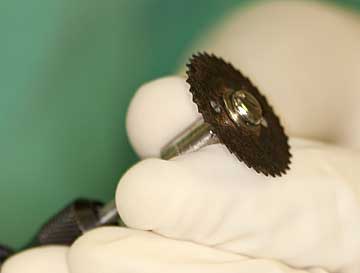
This close up view shows the serrated edge. They wear down fast trying to cut through the tough (but living) shell.

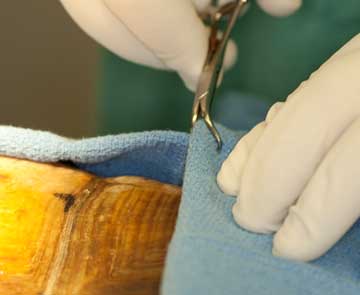
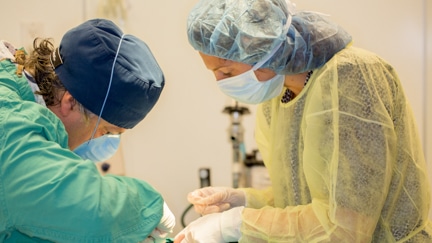
Dr. Ridgeway starts his cut with his safety glasses on to protect him from flying particles brought on by the drill used to cut into the shell

The blade spins at a high speed, so sterile water needs to be constantly applied to the cut surface to minimize overheating and necrosing the shell. The blade cuts at a beveled angle, facilitating replacement of the shell when the surgery is complete. If this angled cut is not made, the shell will just fall back into the abdominal cavity (it is called the coelomic cavity in a reptile), and the shell will not heal.

Spraying sterile water and flying bone fragments means the front lens of your camera is going to get blessed!
This short video shows us cutting the shell with the Dremel

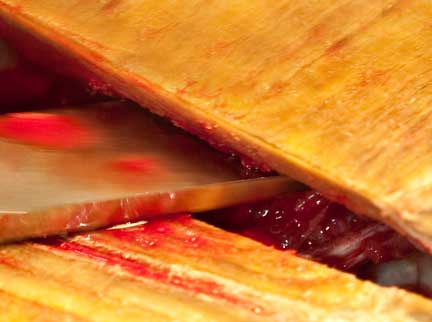
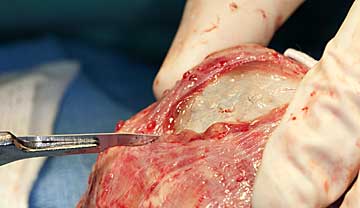
The final appearance of the cut shell before the shell is pried open. Shell is living tissue, which is why there is blood.
Now the shell is gently pried up with an instrument called an elevator. There are muscular attachments that are gently separated from the shell to allow the shell to become completely free.
These muscular attachments are very strong, and it takes gentle but persistent prying to start lifting up the shell
The shell is pried up on all cut edges
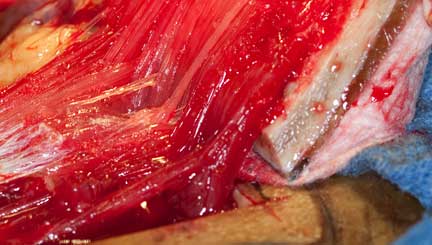
The strong muscular attachment of the shell to the internal body are obvious in this photo. Tortoises are built like tanks!

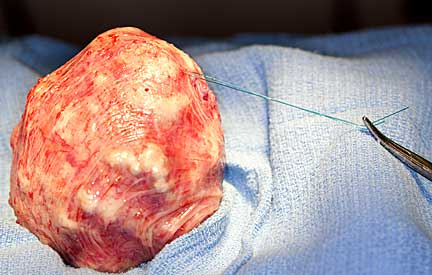
This gives you an idea of the size of the cut shell

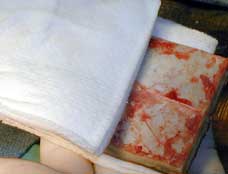
The cut piece of shell is living tissue and needs careful handling.The rectangular piece of cut shell is placed under saline soaked gauze until it is put back at the end of the surgery.

A close up of the edge of the shell that was cut by the Dremel. It is made up of calcium, phosphorous, and a protein matrix. Since reptiles (ectothermic animals) have a slow metabolism, it can take up to two years for the cut shell to completely heal.
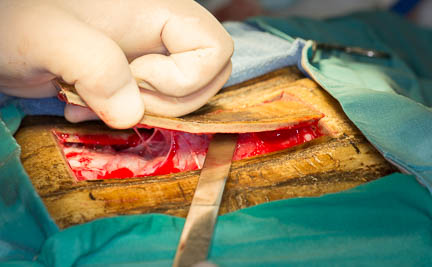
The next layer encountered is the lining of the coelomic cavity. It is gently cut to give full exposure to the organs in the cavity.
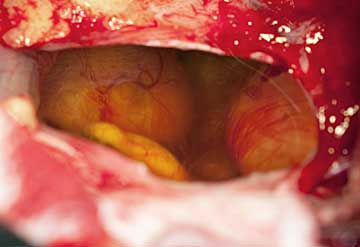
Internal organs can be visualized easily through this large opening. These are egg follicles.
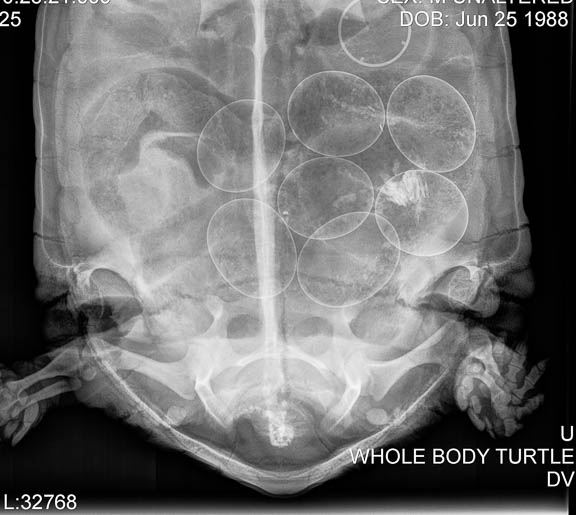
This is what these eggs would look like on a radiograph
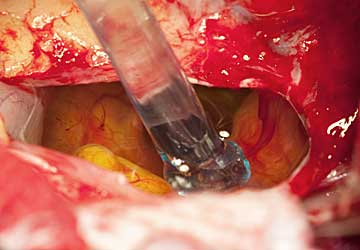
Before we proceed further fluids in the coelomic cavity are suctioned out for better visualization
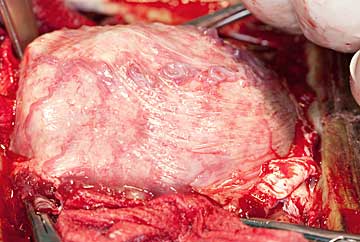
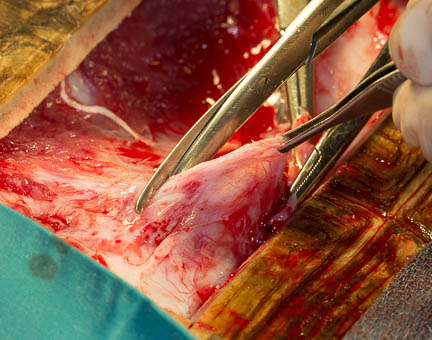
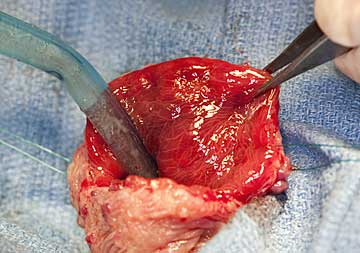
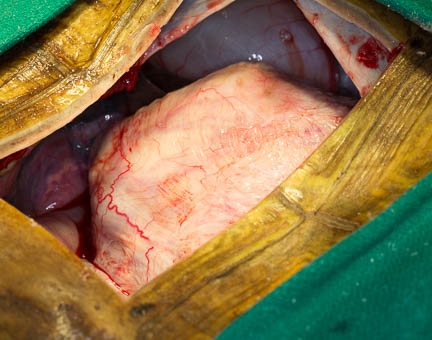
After careful dissection the bladder with the stone in it is exposed
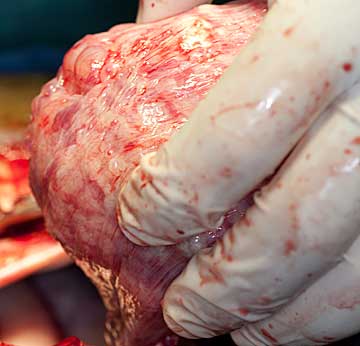
It is gently pulled out of the coelomic cavity

It is packed off with drapes as a first step
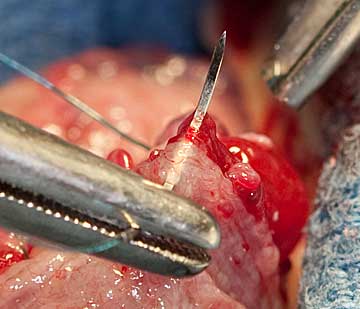
Before actual stone removal a “stay” suture is placed in the bladder at two locations. The suture is then attached to a hemostat and clamped to the towels. This prevents the bladder from falling back into the coelomic cavity when the stone is removed.
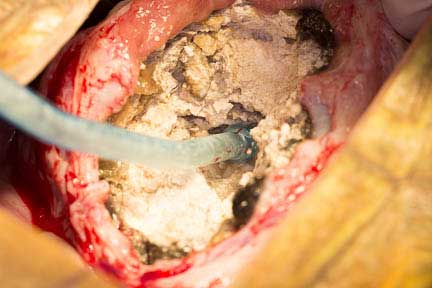
Dr. Ridgeway has made an incision into the bladder and the stone is starting to bulge out
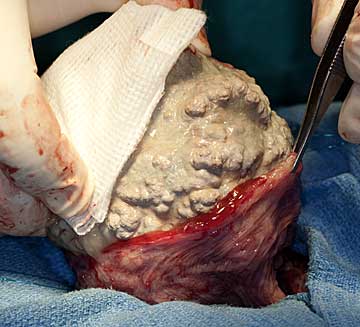
The stone looks like a piece of concrete. Can you imagine what this would feel like inside of you?
Some small fragments of stone can remain in the bladder after the large stone is removed. The smaller pieces of stone are suctioned after the bladder has been flushed. This usually takes many flushings with sterile saline. Only when the bladder has been thoroughly flushed is it sutured back together.
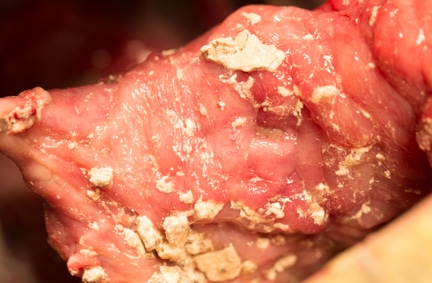
Notice how inflamed the inner lining of the bladder has become from the tremendous irritation from the stone. This bladder is also thickened for the same reason. A normal bladder is very thin walled, almost like tissue paper.
A special suture material is used to close the opening in the bladder. This suture is very strong yet causes minimal tissue reaction, and will slowly dissolve over several months.
When we suture the urinary bladder back together we try to minimize the suture going into the lumen of the bladder, where it can cause more irritation to the already inflamed bladder. We try to place most of the suture in the outer layer of the bladder, called the serosal surface, for this reason. The inner and inflamed layer is call the mucosal surface.

The final outcome of the suture bladder with our plication stitch
The coelomic cavity is also flushed copiously with warm sterile saline, then the fluid is suctioned out. This process helps prevent an infection and aids in the healing process. If an infection is sealed into the coelomic cavity the outcome could be catastrophic.
We flush and suction simultaneously. Bone fragments can be deep into the coelomic cavity, so every nook and cranny needs to be flushed and suctioned. We do this repeatedly with warm sterile saline.
The incision made in the tissue lining the cavity is sutured next, using the same type of suture material as the bladder. The muscular attachments to the cut piece of shell will gradually reestablish themselves to the underside of the cut piece.

Part way there

What it looks like when the suturing is complete
While all of this was going on the piece of shell that was removed at the beginning of the surgery was kept moist by wrapping it with sterile gauze soaked with saline. Doctor R is removing the gauze before putting the cut piece of shell back in place.
Throughout the procedure additional sterile saline was added to the gauze over the shell to keep it moist. Time for this piece of shell to get back to where it belongs.
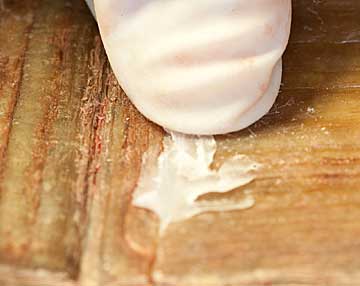
When the shell is back in place bone wax is used to help seal the edges

The bone wax has been inserted all around the cut shell

The fiberglass pieced is sized

Time to mix up the epoxy

The fast-drying epoxy is worked smoothly over the fiberglass
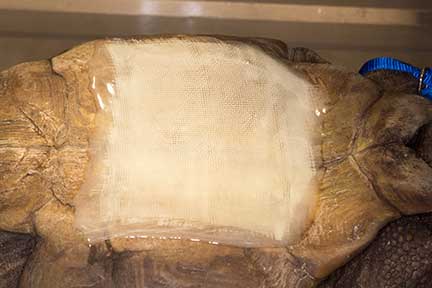
Applying it smoothly like this is a work of art!
The epoxy hardens within a few minutes. During this time it is important that the tortoise does not wake up or breathe deeply, because the pressure in the lungs will push the patch out.
Cellophane is put over the patch for cleanliness

Here is our friend just waking up from anesthesia. We remove the breathing tube when she is breathing on her own adequately.
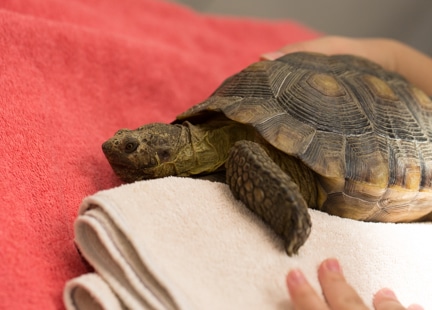
Our sleepy friend is placed on warm towels before, during, and especially after, the surgery
At this point we will give her a pain injection and place her in a special room that maintains a temperature of 85 degrees. She will stay in the hospital for a few days until she is eating and active.
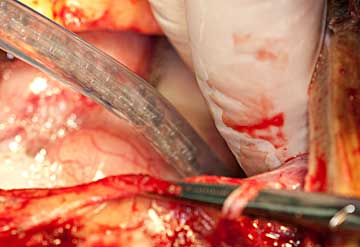
During the procedure our surgeon can see the heart beating during the surgery because reptiles do not have a diaphragm, the muscle that separates the chest from the abdomen. Since there is no abdomen, technically it is called the coelomic cavity.
We have two short videos of the beating heart of a tortoise during this procedure. One is from a little further away so you can see the heart in relation to the opening in the shell, the other is a close up. Count how slow the heart beats.
Occasionally we encounter a stone in the bladder that is so huge the we cannot bring the bladder out of the opening in the shell. In this case we need to break the stone into smaller pieces.
This is how when of these large stones looks on a radiograph
This is how it appears during surgery, too big to pass through the opening in the shell

You can see the “stay” suture holding the bladder up for better access in the deep coelomic cavity

The thickened bladder needs to be incised with a scalpel blade to get full access to the stone

The highly thickened bladder is obvious

This bladder stone is dark, probably due to the chronic nature of it being in this urinary bladder for so long

In a case like this we need to break up the stone while it is still in the bladder inside the coelomic cavity. This is a tedious and long procedure.

The center of this large stone is fluid filled
Fluid in the center of the bladder is suctioned out

Some of the stone fragments are fragile and break up as they are being removed

Some pieces are large

The pile of removed stone and fragments was almost 2 pounds

Once we removed the large pieces there were hundreds of small fragments lining the bladder. They can be the basis for stone reformation and need to be removed.

Eventually we flush the bladder with saline and suction final tiny pieces out

Only when all stone fragments are removed do we suture up the bladder

Before we put everything back together we check the internal organs for any pathology. This is a lobe of the liver
Prevention
Keep your tortoise well hydrated with access to drinking water and soaking as previously described. Feed minimal amounts of green leafy vegetables and large amounts of grass. Do not supplement with excess calcium or Vitamin D3 if your tortoise has access to direct sunshine as seen in our western and souther states. It is theorized that an active tortoise foraging in a large area will excrete more urates when it urinates. Keeping it in a small area can inhibit its activity and potentially lose this advantage when exercising.
A yearly exam (palpating for bladder stones), blood panel, and radiograph, goes a long way to detecting a stone early. If small enough these stones might be amenable to being flushed out or removed by a pre-femoral approach, which is obviously much easier on your tortoise than cutting the shell.